I have come up with a way to sharpen end mills using the milling machine.
In fact, the setup is tricky
enough that I have to look at my own pictures to set it up right.
The tool to be sharpened is held in a 5C collet in a fixture I got from
ENCO for $38.99.
(Perhaps I got it for a little less on sale.) This is on P 151 of the
95/96 full-line catalog, as #287-6840 'End Mill Grinding Fixture'.
The little picture in the catalog on this tool is all the help you'll
get from Enco in using this - there was no paper at all in the box.
They show it on a standard surface grinder, I think. The grinder shaft
is horizontal, but as long as the grinding is really done by horizontal
traverse of the table, all surfaces will be flat, and so the plane of
rotation shouldn't matter, I thought. So, if I put a cup wheel in the
spindle of my mill, I should be able to grind the top of a surface, too.
Of course, it gets a little more complicated when you do serious
sharpening of mills that are badly worn or have a corner chipped off.
Then you have to regrind the relief and gashing, too. If the mill is
just slightly worn, just the primary relief can be done, in
under 5 minutes.
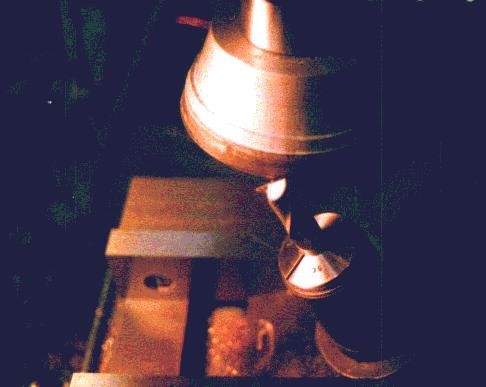
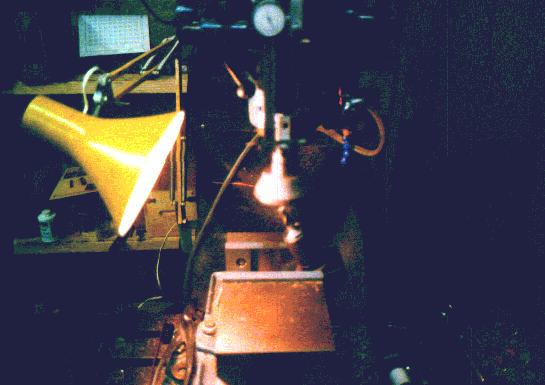 Here's an overall view of the setup.
I suggest getting a book on end mill sharpening from a good library if
you can. I would have never figured all this out without a good
illustrated text. Try the library of a university with a mechanical
engineering department, a tech school, or high school with a vocational
department. These books will show how to do it with a cutter grinder,
almost always with a cup-type diamond wheel. I have used both a
'flaring cup' type wheel of alumina (Aluminum Oxide) abrasive, as well
as a diamond resin-bonded flaring cup wheel. The diamond wheel
keeps a sharp edge longer, and leaves a much smoother finish on
the cutting edges. This is actually
similar to what is frequently used on a cutter grinder, and so makes
translating the pictures in the book a little easier. The Cup-type
wheel is essential for gashing. That side relief makes it possible to
get UNDER one cutting edge to gash the other one. My alumina wheel is
similar to Enco's # 391-1153. These are fine grain, hard abrasive,
which seemed to be the right material. I take a swipe across the bottom
of the wheel with a diamond dressing point before starting. Hold the
diamond in a vise, or possibly in the collet of the fixture, and use the
table feed to pass it under the wheel. Just
make sure it is tipped away from the direction of the rotation
of the wheel.
Take off just a thousandth or so
each pass, and the diamond will not show any visible wear.
 Dressing the flaring cup wheel.
Anyway, the end mill grinding fixture holds the cutter in two
possible positions.
When set on its flat base, it holds the cutter at about 15 degrees in
one plane, and at about 5 degrees in the other. This is the position
you use for the primary relief, and it sharpens the cutting edge.
it also applies about 5 degrees tilt, so the radial edge of the cutter is
just a few thousandths farther out than the center. I never knew end
mills were ground this way - the tilt is apparently much less on a
factory-ground mill - but they work just fine this way.
So, the trick here is to have the fixture mounted on the table with
the 30 degree miter in the base facing the left, the wide part of the
base clamped flat to the table (or in a vise). The end mill should be
set so that the hub is in a detent, and the cutting facets are lying
parallel to the Y axis. (If a 4 flute mill, then either pair lying
parallel to the Y axis.) Position the table so the rear cutting edge
can be fed into the front left quadrant of the wheel. Try adjusting the
X position so that when the wheel edge approaches the center of the mill,
it approximates the angle of the gashing that separates the two cutting
edges at the center. After making a grinding pass, then rotate the hub
180 degrees, and make a pass on this facet to the same point on the
Y position. Examine with jeweler's loupe (Super 8 mm projection lenses
make FANTASTIC jeweler's loupes - although they won't stay in your eye
socket) to see that the grinding goes all the way to the center. If
not, advance
the Y a little more and check again. When you've got it, then do all
facets until the cutting edges are all sharp all the way across the edge.
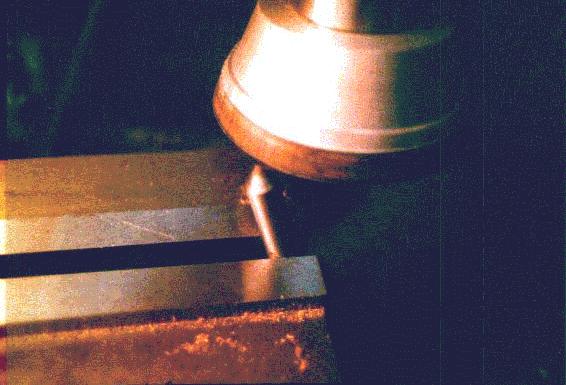
 Grinding the primary relief.
Step 2 is to grind the second relief, if needed. Now, tip the fixture
onto the 30 degree facet, with the 30 degree facet to the left. Hold
in a vise or clamp to the table. To make clamping easier, I cut a flat
in the top of the fixture's bottom plate which is level when the fixture
is on the 30 degree facet. I can place a clamp on that flat.
But, I've found that the vise makes the work go several times faster,
so I no longer use the flat I milled. You can see it in the
photos, however. Now, with the end mill approaching the same quadrant
of the wheel, bring
the tool slowly into the wheel from the front, with the Y feed. Adjust
X position until the tapered side of the cup wheel clears the cutting
edges while grinding down the secondary reliefs. This is particularly
tricky on 4-flute mills. This work is not as critical as the primary
relief, which is actually part of the cutting edge. The secondary relief
just provides room for chips to escape.
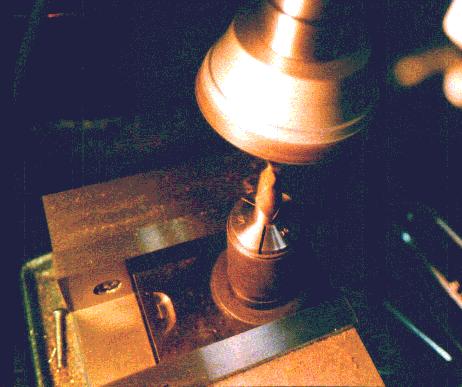
 Grinding the secondary relief.
Gashing is used to make the center of a center-cutting end mill somewhat
like the point of a drill bit.
Gashing is necessary for major repair to an end mill, when .050" or so
has to be ground off the length. This is done with the fixture set up
as for the second relief, but the table is moved so that the end mill
approaches the wheel from the FRONT side. Turn the hub a few notches
counter-clockwise, one notch less than 90 degrees. (Should be 5 detents.)
This has the 2 cutting edges almost parallel to the X axis, but the left
edge is a little back, the right edge a little toward the front.
Now, pass the mill back and forth with the X axis, while slowly stepping
the table back with the Y axis. Observe the wheel cutting closer and
closer to the right cutting edge. Stop before you cut into the right
cutting edge, but get close enough to eliminate the large flat land at
the center of the mill. Look at a new 2-flute mill to see what you are
trying to achieve. What you want is this :
          xxxxxxxxxx
         xxxxxxxxxxxx gash here
        xxxxxxxxxxxxxxxxxxxxxxxxxxx
            gash here xxxxxxxxxxxx
                       xxxxxxxxxx
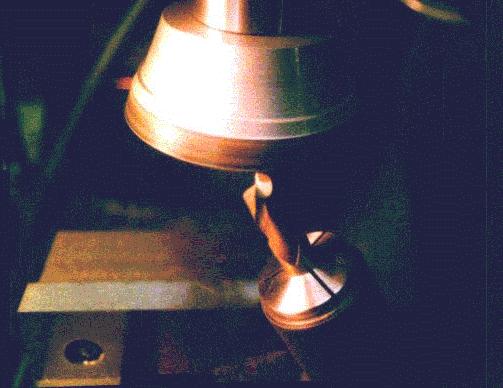
 Gashing under the cutting edge.
This is the trickiest part by far! I have made several messes, had to
repeat the first part after bad gashing attempts, etc. But I also have
made a few end mills look just like they were absolutely new! I wish
I had video taped those grinding attempts, so that I could see how I
did it! But, I am getting better, and I can now routinely make end mills
that will plunge properly.
Start with really blitzed end mills, of which we all probably have a few.
Keep the nearly good ones for last, so you can look at them
and follow their contour.